If you’re into car care or even mildly obsessed with that smooth, mirror-like finish on your paint, then you’ve probably heard the term “clay bar treatment” tossed around. But what exactly is it? Is it worth the extra time and effort? And why do professional detailers swear by it?
Let’s dive deep into this often-overlooked step in the detailing process and explore why it might just be the most important thing you’re not doing for your car.
So, What Is a Clay Bar?
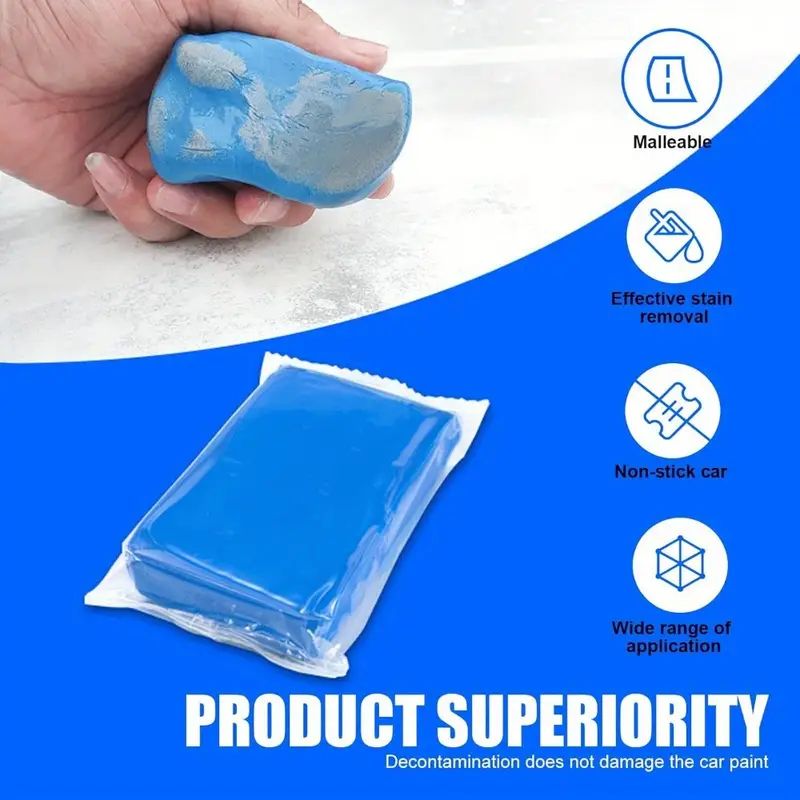
First things first—no, it’s not actual clay like you’d find in a pottery studio. A detailing clay bar is a synthetic resin compound, designed specifically for use on automotive paint. Its job is to safely lift and remove contaminants from the surface of your car that regular washing just can’t touch.
The clay itself feels rubbery and slightly tacky to the touch. It usually comes in small bars or discs, often wrapped in plastic or packaged with a lubricant (more on that in a second). Think of it as a magnet for microscopic grime.
Clay bars are generally made from either natural or synthetic materials. While natural clay was more common in the early days of detailing, most modern clay bars are synthetic. They’re typically composed of a mix of polymers and abrasives that are sticky enough to pick up contaminants but gentle enough not to scratch paint—when used correctly, of course.
What Does a Clay Bar Actually Do?
Even after you’ve given your car a proper wash with soap and water, the paint might still feel rough to the touch. That’s because there are bonded contaminants—tiny particles that stick to your paint over time and refuse to budge, even under the pressure of a power washer.
These contaminants can include:
- Industrial fallout (tiny bits of metal from factories or trains)
- Brake dust
- Road tar
- Tree sap
- Bird droppings (and the residue they leave behind)
- Overspray from paint or sealants
- Bug guts
- Mineral deposits from hard water
What the clay bar does is glide over the surface of your car—paired with a clay lubricant—and grab hold of those stubborn particles. As you work the clay back and forth, it gently lifts these embedded contaminants out of the clear coat without damaging it.
The result? A surface that’s not just clean to the eye, but clean to the touch. Smooth, flawless, and ready for whatever comes next—whether it’s polishing, waxing, or ceramic coating.
Why Clay Bar Treatment Is So Important
You might be thinking, “My car looks clean. Why bother with this extra step?”
Here’s the deal: if you skip clay barring and go straight to polishing or waxing, you’re essentially sealing in that contamination. Worse, those particles can become abrasive during polishing and end up scratching the paint. That’s right—you could be damaging your finish while trying to improve it.
Clay bar treatment is all about proper preparation. Think of it like painting a wall—you wouldn’t slap on a fresh coat without sanding off the old flaking paint and cleaning the surface first, right? The same logic applies here.
Here are a few key benefits:
1. Improves Paint Smoothness
After claying, your car’s surface will feel buttery smooth. It’s one of those things you don’t truly appreciate until you run your hand over the hood and feel the difference.
2. Prepares for Polishing and Waxing
Clay barring ensures your paint is as clean as possible, which means any product you apply afterwards—whether it’s a wax, sealant, or ceramic coating—can bond better and last longer.
3. Enhances Gloss and Clarity
Removing embedded particles allows light to reflect more cleanly off the paint, giving your car that extra pop in gloss and depth of color.
4. Extends the Life of Protective Coatings
If you’re investing in ceramic coating or paint sealants, you need a clay bar treatment beforehand. Otherwise, the coating won’t adhere properly and won’t deliver the longevity it’s designed for.
How Often Should You Clay Your Car?
There’s no hard rule here, but most experts recommend claying your car every 6 to 12 months—more often if you park outside or drive in areas with high pollution or industrial activity.
A good rule of thumb: after washing, run your fingertips lightly across the surface of your paint. If it feels rough or you hear a slight “gritty” sound, it’s time for a clay bar session.
The Clay Bar Process – Step by Step
Here’s how the pros (like us at The Detailing Company) do it:
Step 1: Thorough Wash
Start by giving the car a proper two-bucket wash. Remove all surface-level dirt, grime, and debris. You want the paint as clean as possible before introducing the clay.
Step 2: Surface Inspection
After rinsing and drying, feel the paint with your fingertips. Focus on horizontal panels like the hood, roof, and trunk. These areas tend to collect the most contaminants.
Step 3: Clay Lubrication
Apply a dedicated clay lubricant to a small section of the car (roughly 60cm x 60cm). The lubricant is crucial—it prevents the clay from sticking too aggressively and dragging across the paint, which could cause micro-scratches.
Step 4: Clay the Panel
Gently glide the clay back and forth across the lubricated area. Don’t use pressure—let the clay do the work. As the contaminants are removed, you’ll feel the clay glide more smoothly.
Step 5: Wipe and Inspect
Once a section feels smooth, wipe it down with a microfiber cloth and move on to the next. Fold the clay to expose a clean surface as it gets dirty.
Step 6: Final Rinse or IPA Wipe
Once all panels are done, some detailers prefer a quick rinse or an isopropyl alcohol (IPA) wipe to remove any leftover lubricant residue before polishing or sealing.
Types of Clay Bars
Not all clay bars are created equal. There are a few different grades:
- Fine Grade – Ideal for newer vehicles or those that are regularly maintained.
- Medium Grade – More aggressive, better for older cars or vehicles with moderate contamination.
- Heavy Grade – Used for severe cases, but not recommended for beginners as it can mar paint if not handled correctly.
There are also clay mitts and clay towels, which offer the same results with slightly less elbow grease and a bit more convenience, especially for large vehicles or repeat applications.
Common Mistakes to Avoid
- Using Dish Soap or No Lubricant
This is a big one. Always use a proper clay lubricant. Using water or household soaps won’t give the necessary slip and can cause scratching. - Applying Too Much Pressure
You’re not sanding the paint—light pressure is all you need. Let the clay do its thing. - Using a Dirty Clay Bar
Once the clay gets too contaminated, it’s time to toss it. Don’t risk dragging embedded grit across your paint. - Skipping the Wash
Don’t clay a dirty car. Ever. It’s a recipe for swirls and scratches.
DIY or Professional?
Clay bar kits are widely available, and yes—you can do it yourself if you’re comfortable with the process. That said, there’s something to be said for letting the pros handle it, especially if you’re planning to follow it up with polishing or a ceramic coating.
At The Detailing Company, every paint correction and ceramic coating service starts with a proper clay bar treatment. It’s not optional. We treat it as a non-negotiable step in achieving that signature glossy, showroom finish.
Final Thoughts: The Clay Bar Is Underrated—But Essential
It might not be the flashiest part of the detailing world, but the clay bar treatment is the unsung hero behind every glassy, smooth, mirror-like paint job. It’s a small step with a massive impact—and once you experience the difference it makes, there’s no going back.
So the next time you’re treating your car to some TLC, don’t skip the clay. Whether you’re a weekend warrior or a first-time visitor to The Detailing Company, we’ll make sure your paint gets the full treatment it deserves.
Want to book a professional detail that includes clay bar treatment?
Visit us at The Detailing Company, based @ V8 Roadhouse, Schoemansville, Hartbeespoort or call us today to schedule your appointment. Your paintwork will thank you.